709-218-7927 The Landfall Garden House 60 Canon Bayley Road Bonavista, Newfoundland CANADA A0C 1B0 |
|
|---|
.JPG)
Bookcases
Thursday, September 01, 2022
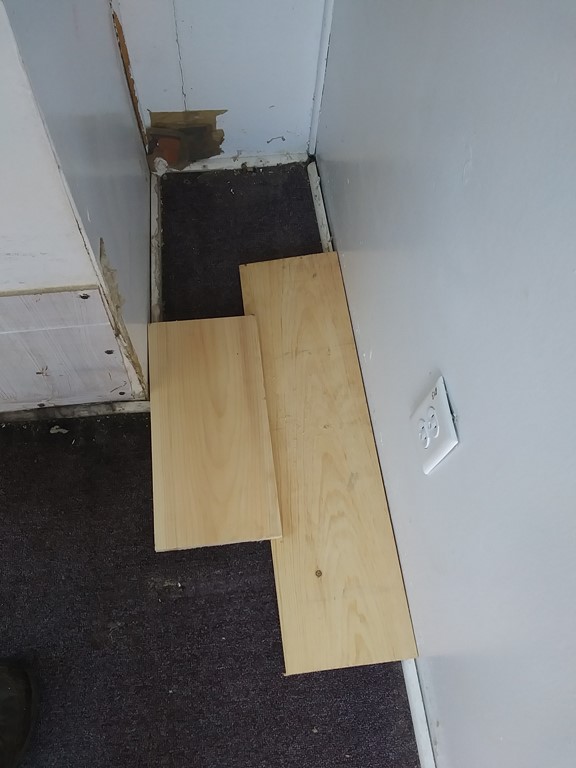
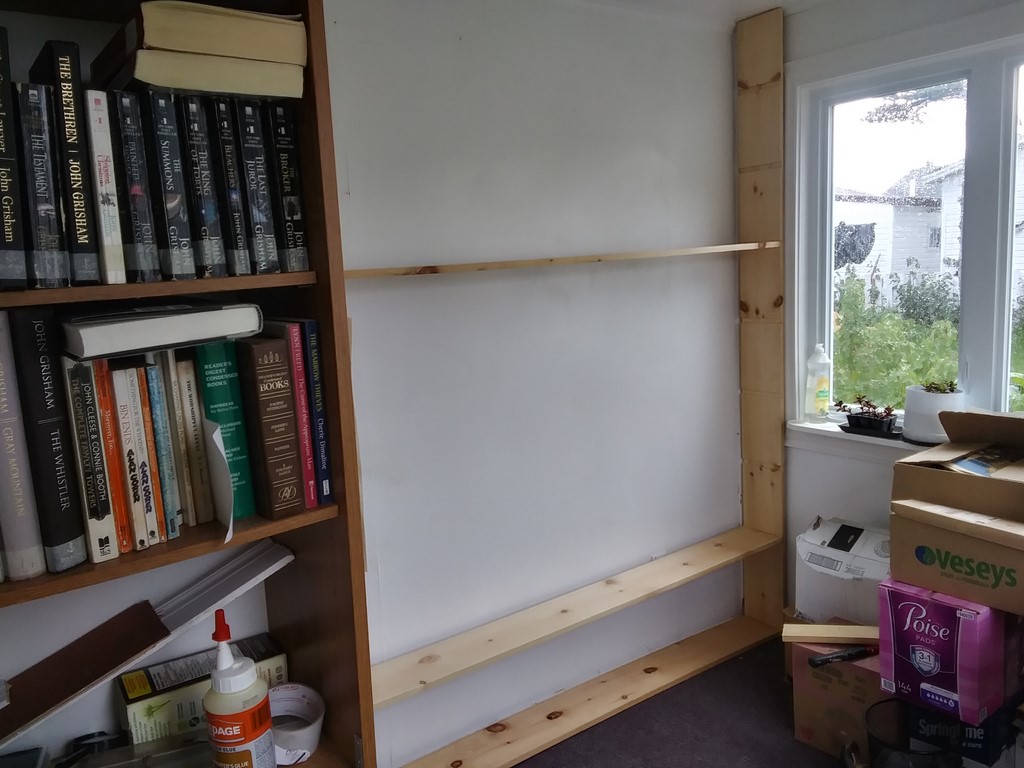
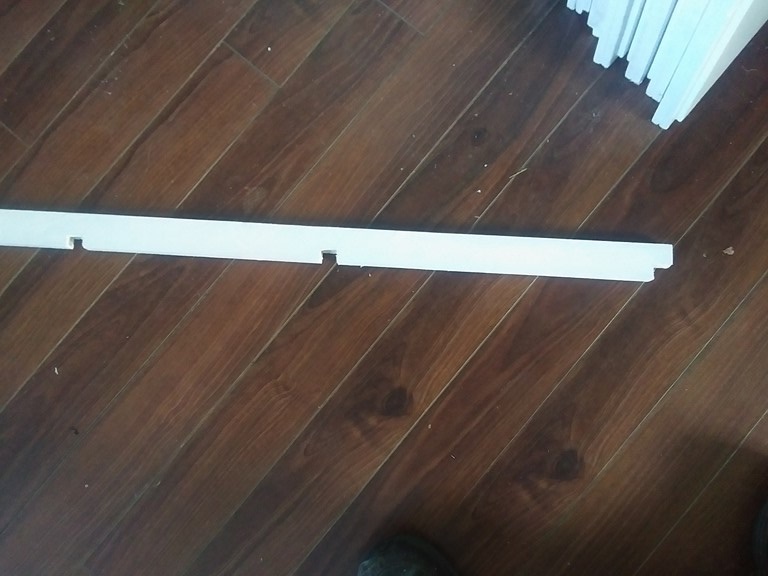
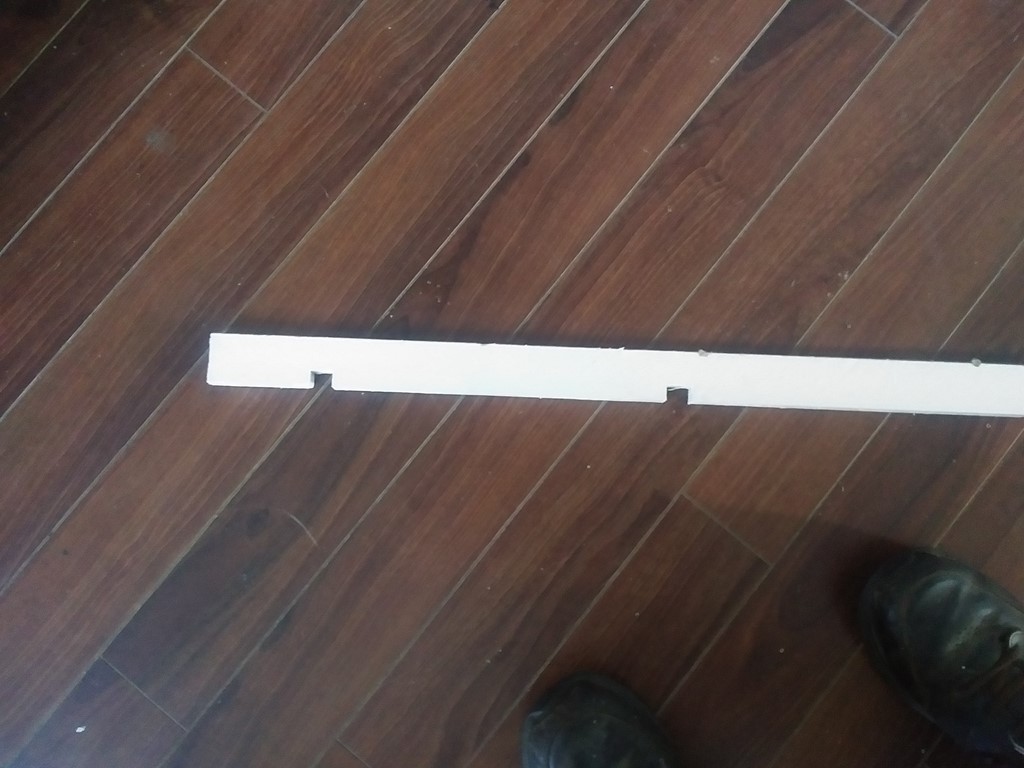
Two scraps of shelf laid side-by-side overlap. The longer one can represent a full-width shelf that runs the length of the eastern wall to the end of the cavity. The shorter one represents a 20" shelf that has been ripped to fit, probably about five inches wide. Such a piece would need a support along the chimney side, probably a single vertical with wood blocks, and a grooved fitting into a ripped vertical lying snugly against a full-width vertical on the northern end of the cavity.
Piece |
Height/length |
|
|---|---|---|
Southern vertical |
91.00 |
Carpet to ceiling. Will stand half-inch away from the wall on account of the quarter-rounds AND the window trim. |
Northern vertical |
91.00 |
Carpet to ceiling. Will stand half-inch away from the wall on account of the quarter-rounds AND the window trim. |
Floor base |
109.25 |
Measured inside the two scraps leant against the quarter round. |
Given the gap between the verticals and the quarter-round, I may need to glue or tack small bolsters/spacers hidden behind the verticals to maintain a true vertical. Otherwise the shelves might cause the verticals to bow into the half-inch gap.
The outlets are about the 10.5 height from the wall. Consider making the lowest shelf 15" high, and use it as the "tall books" shelf for the shelves above?
Study bookshelves.xls
0 |
|
|---|---|
21 |
10.5 |
42 |
31.5 |
63 |
52.5 |
84 |
73.5 |
105 |
94.5 |
The floor shelf has vertical (wooden) supports 15" high. Left-edge at 21, 42, 63, and 84 inches from the northern cavity. The 15" height avoids the outlets, and the two outlets at 25-28 and 91-94 inches are cleared.
The first regular shelf has 10.5" high supports at 10.5, 31.5, 52.5, 73.5, but needs no support at 94.5.
Alternate shelves have 10.5" high supports at 21, 42, 63, and 84 inches from the northern cavity, identical to the floor shelf.
We continue in this way until the ceiling is reached.
This yields eight horizontal planks:
floor to ceiling |
remaining |
||
|---|---|---|---|
91 |
91.00 |
||
shelf 1 |
1.0 |
90.00 |
|
15.0 |
gap |
75.00 |
|
shelf 2 |
1.0 |
74.00 |
|
10.5 |
gap |
63.50 |
|
shelf 3 |
1.0 |
62.50 |
|
10.5 |
gap |
52.00 |
|
shelf 4 |
1.0 |
51.00 |
|
10.5 |
gap |
40.50 |
|
shelf 5 |
1.0 |
39.50 |
|
10.5 |
gap |
29.00 |
|
shelf 6 |
1.0 |
28.00 |
|
10.5 |
gap |
17.50 |
|
shelf 7 |
1.0 |
16.50 |
|
10.5 |
gap |
6.00 |
|
shelf 8 |
1.0 |
5.00 |
The top plank leaves a gap of about five inches to the ceiling. This gap could be used for? Long-term storage, perhaps an excess of coffee-table books that do not fit the floor shelf?
Eight shelves means eight of my twelve-foot planks. That top shelf has no supports above it, so we have seven sets of supports between the shelves for a total of 312 inches which looks like another three planks, but I should be able to recover eight chunks of 35 inches each.
chunk 1 |
chunk 2 |
chunk 3 |
chunk 4 |
chunk 5 |
chunk 6 |
chunk 7 |
chunk 8 |
||
|---|---|---|---|---|---|---|---|---|---|
35 |
35 |
35 |
35 |
35 |
35 |
35 |
35 |
||
remaining |
20.0 |
||||||||
5.0 |
|||||||||
20.0 |
|||||||||
5.0 |
|||||||||
24.5 |
|||||||||
14.0 |
|||||||||
3.5 |
|||||||||
24.5 |
|||||||||
14.0 |
|||||||||
shelf 1 |
15.0 |
15.0 |
15.0 |
15.0 |
3.5 |
||||
24.5 |
|||||||||
shelf 2 |
10.5 |
10.5 |
10.5 |
10.5 |
14.0 |
||||
3.5 |
|||||||||
shelf 3 |
10.5 |
10.5 |
10.5 |
10.5 |
24.5 |
||||
14.0 |
|||||||||
shelf 4 |
10.5 |
10.5 |
10.5 |
10.5 |
3.5 |
||||
24.5 |
|||||||||
shelf 5 |
10.5 |
10.5 |
10.5 |
10.5 |
14.0 |
||||
3.5 |
|||||||||
shelf 6 |
10.5 |
10.5 |
10.5 |
10.5 |
24.5 |
||||
14.0 |
|||||||||
shelf 7 |
10.5 |
10.5 |
10.5 |
10.5 |
3.5 |
If I have done this right, I can get 22 vertical supports from my chunks lopped off eight planks.
I need 28 verticals, so I am lacking timber for six 10.5" verticals, which will have to come from another plank.
My total requirement then is:-
Seven 12' planks for the seven shelves; these planks supply 22 verticals. I need another six 10.5" verticals.
Two 12' planks for the end verticals. These are 91" leaving 21", enough for two more 10.5 verticals each, so four 10.5" verticals altogether.
That leaves me a requirement for two more verticals.
Without buying more timber, I may be able to get by by reducing the top two gaps by one vertical support each, although that would not be aesthetic.
Noted that if the floor plank is horizontal, then the verticals can be measured and cut, and the corresponding grooves be sawn and chiseled.
Friday, September 02, 2022
The floor shelf is distinctly NOT level by 1� to 2 inches over the 109" length. My options seem to be:-
(a)�Ignore the slope, make uprights same length, the floor appears to be parallel to the ceiling anyway
(b)�Cancel the slope on the first shelf where no-one will notice, but then people might notice the top shelf, which is going to demonstrate a gap ranging from 3" to 5" from the ceiling.
(c)�Cancel the slope in increments from the first to last shelf where people will not see a 3" to 5" gradient from the ceiling. This seems too complex for me.
The impact of variable height will be recorded permanently in the shelf grooves chiseled into the two end verticals. Worst case: I must at some time dismantle the shelves and buy two new verticals.
I decide to KISS and use a set of 15" and 10.5" verticals. So I will identify my three components to date, dis-assemble them, and mark and cut the grooves. That done I can cut successive shelves to the length from groove to groove and slide in the shelves. First I need a set of spacer-blocks to hold the end verticals away from the wall.
Thursday, September 15, 2022

I slotted the verticals for one shelf, cut the shelf to length, and it fitted in well.
At both ends! (hah hah). Now for the rest of the slots in the verticals, lengths for six more shelves, then dismantle the lot and paint it white, and gloss white. Then assemble it and return books to shelves.
At 1830 26c in the study.
I begin my study east wall bookshelves. I have the north vertical with one slot. The floor plank sits between the verticals and holds them against the wall.
The slot makes a fifteen-inch gap between the floor shelf and the next shelf. This gap will hold large books that belong to the Dewey sequences above. All other shelf gaps will be ten inches.
Friday, September 16, 2022
All the slots are cut and chiseled (my rough carpentry). I need five more 6" planks. Cut them to length and fit them into slots.
After that, label each of the ten planks, break down the bookcase, paint with white primer, then with white gloss, then re-assemble.
Monday, September 19, 2022
5 planks plus three verticals.
Craig rolls back, late, with a makeup load. Tomorrow I will check the order, payment and phone to get it all straightened out.
Tuesday, September 20, 2022
Notch the three back posts, trim the five shelves, assemble the lot. Take a photo, dis-assemble and then paint all flat white in the shed.
The eight shelves are in place.
Some of the eight shelves are slightly short, by about 1/16 of an inch, but once (a) the slots are painted and (b) books are in place, the shelves should not shift. At this time I must label than extract the shelves, match the two verticals, and make three narrower verticals across the back, then re-assemble, and take the photo to Donna and Craig.
Wednesday, September 21, 2022
Painting bookcase.
By 16:15 I have glossed the upper surfaces of ten planks.
After 3+ years in Newfoundland I have learned why I can not find gloss paint in Swyers. It is, Keith told me, because of Newfoundland law that aims to curtail the use of mineral-spirits ("turpentine") and oil-based paints.
The only reason for using gloss paint, says the law, is to inhibit rust on steel materials.
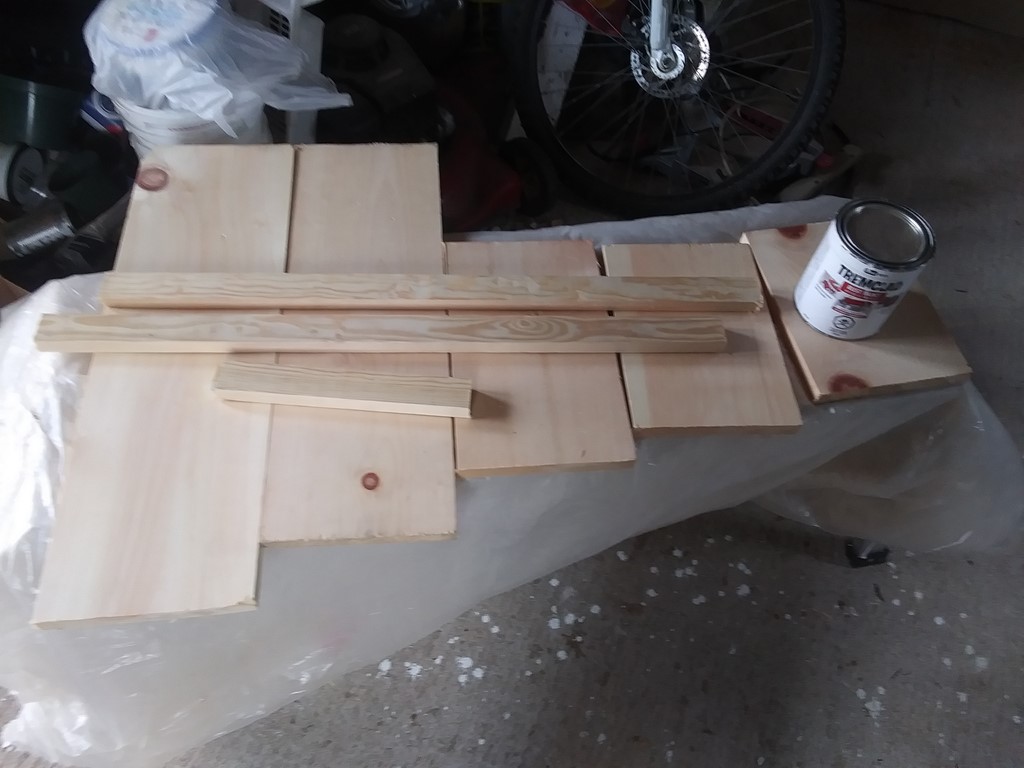
That is why Swyers has a wall-unit of cans marked "RUST" in bold rust-red letters, every can with a picture of a children's pull-cart The product is, you see, technically "rust paint", especially useful on children's toys.
The image above shows me partway through putting a coat of anti-rust paint over my collection of fourteen knotty-pinewood planks which, any day now, can be re-assembled into a wall-long bookcase, which means that after three months of upheaval I can start the path towards recovery of my home.
Cartons of boxes can be unpacked and the books arranged in Dewey sequence, and that means that one of the blocked corridors leading to my blocked laundry-room will become navigable again ...
I am going to stick my neck out here, and predict that not a single spot of rust will appear on my pinewood planking over the next, oh, let's say ten more years.
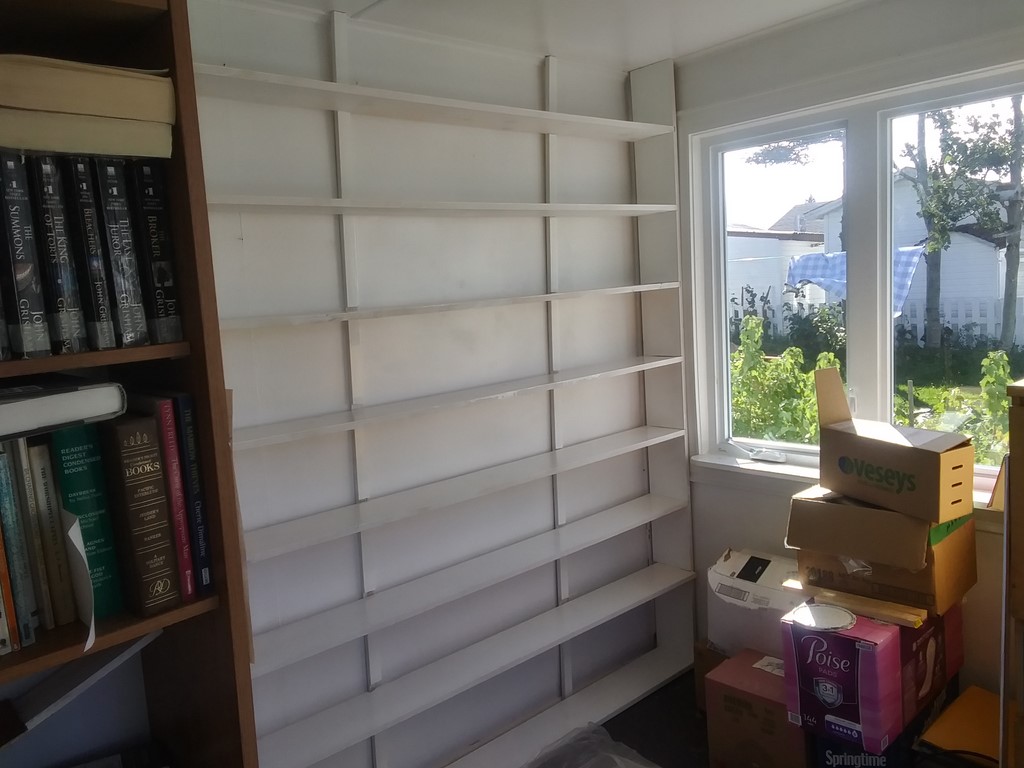
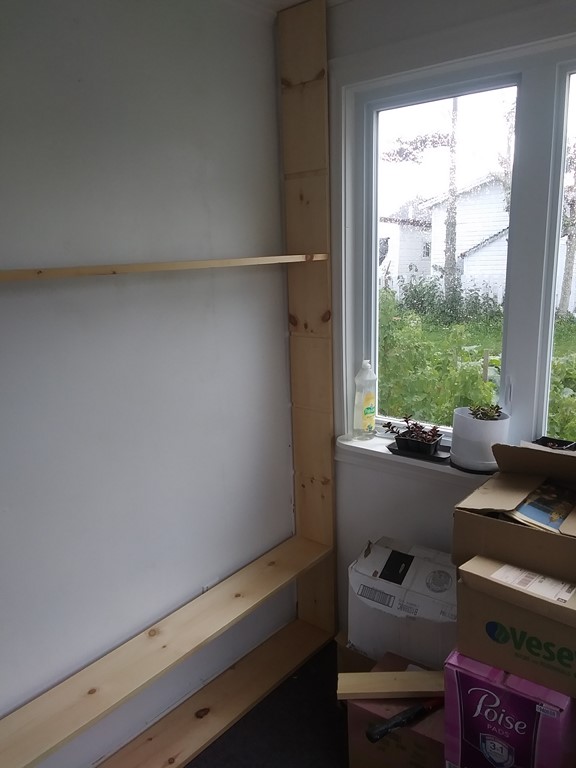
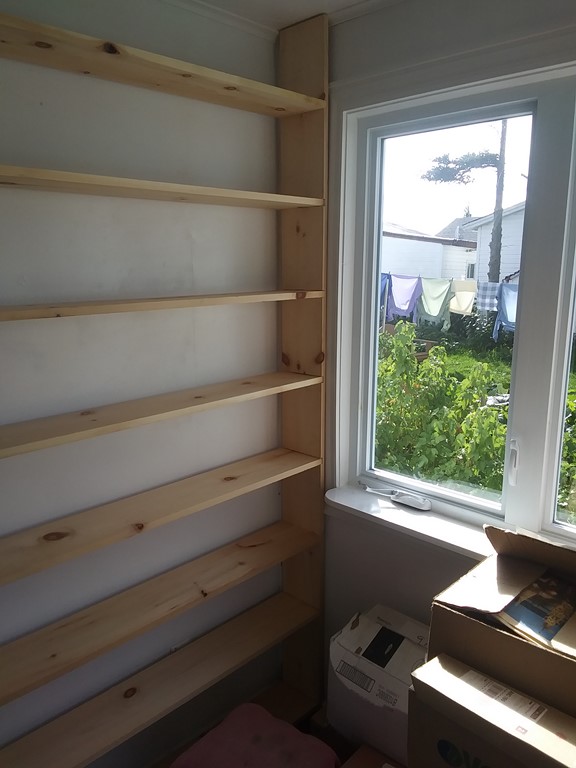
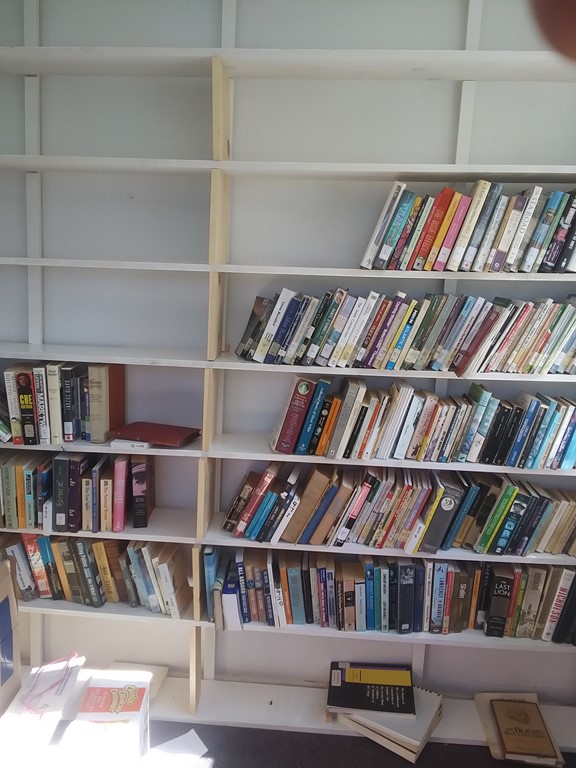
The view from my study door. The new window is where there was a solid wall. The shelves stretch from that southern wall to the northern wall, out of sight to the left. 110 inches. Eight shelves at 15, 10, 10, 10 inches to the top.
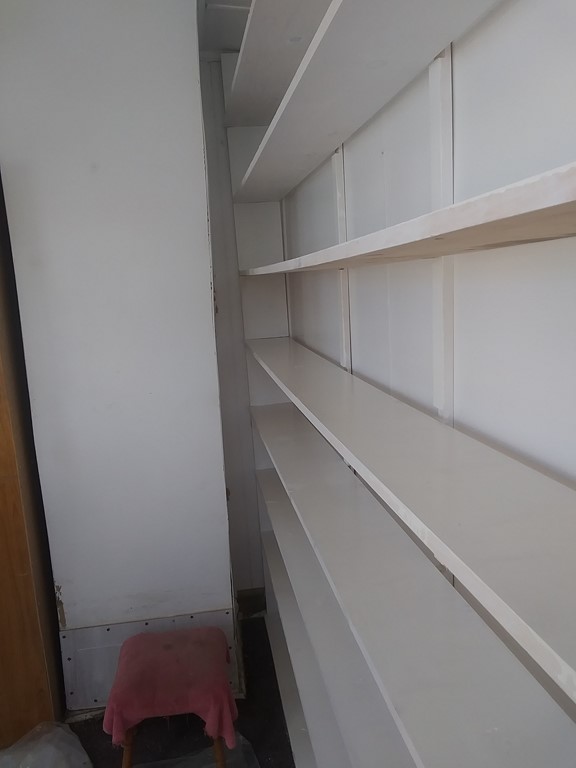
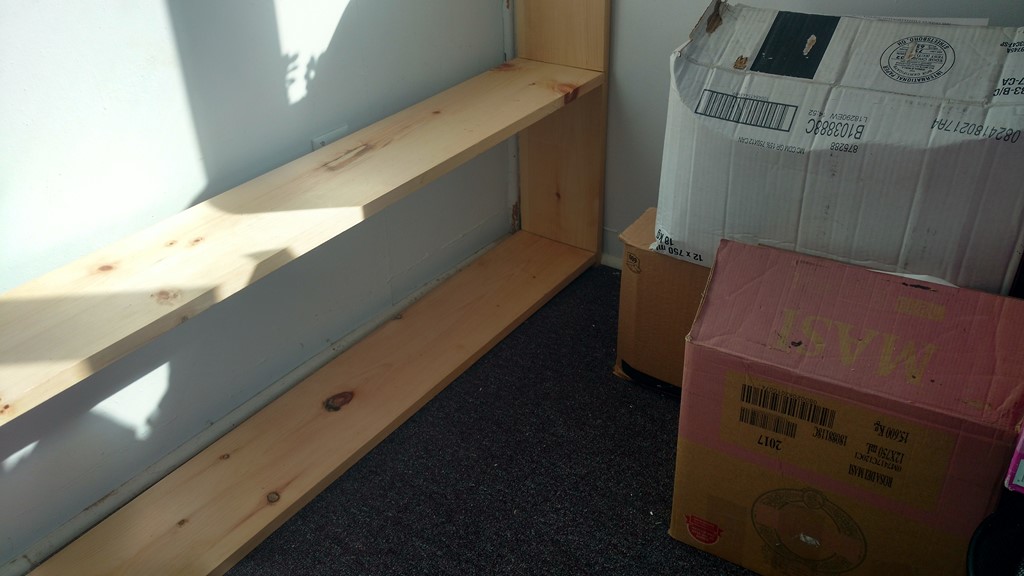
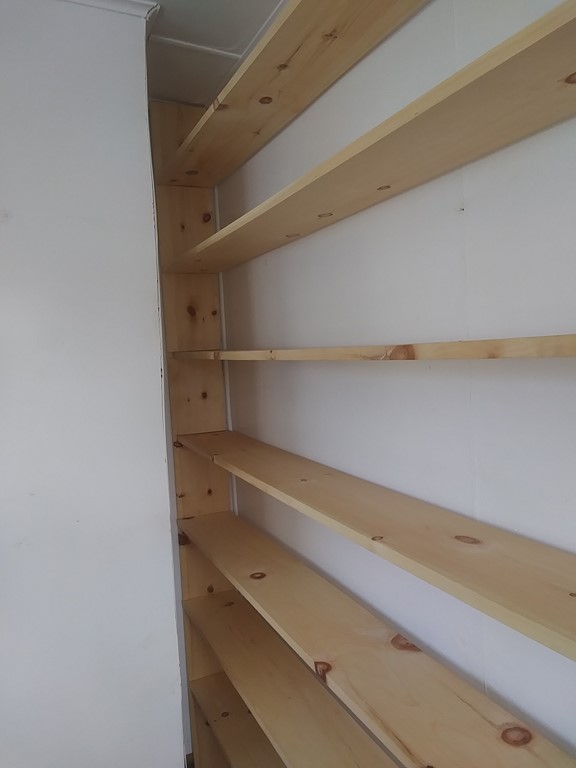
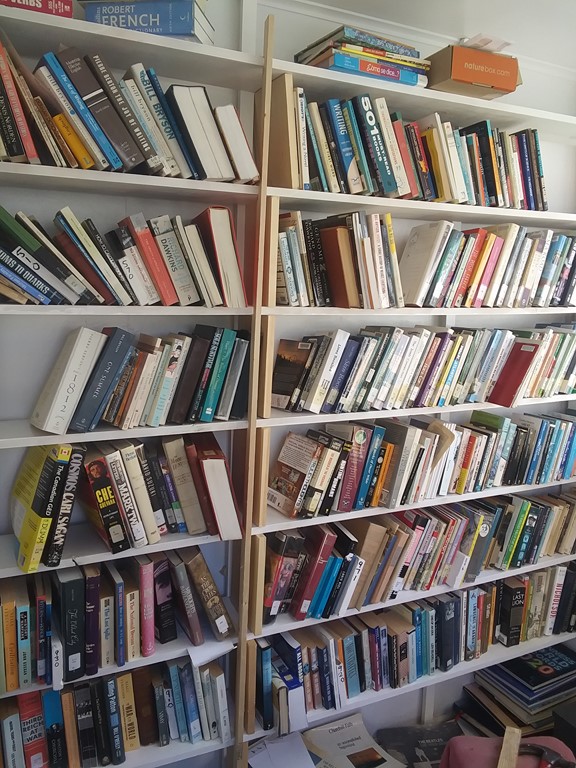
The other end. I built the shelves to extend to the wall into the useless space alongside the chimney, on the grounds that the chimney will be removed, but books last forever. To the left of this chimney can be seen the edge of my remaining junk bookcase, and after that, the doorway.
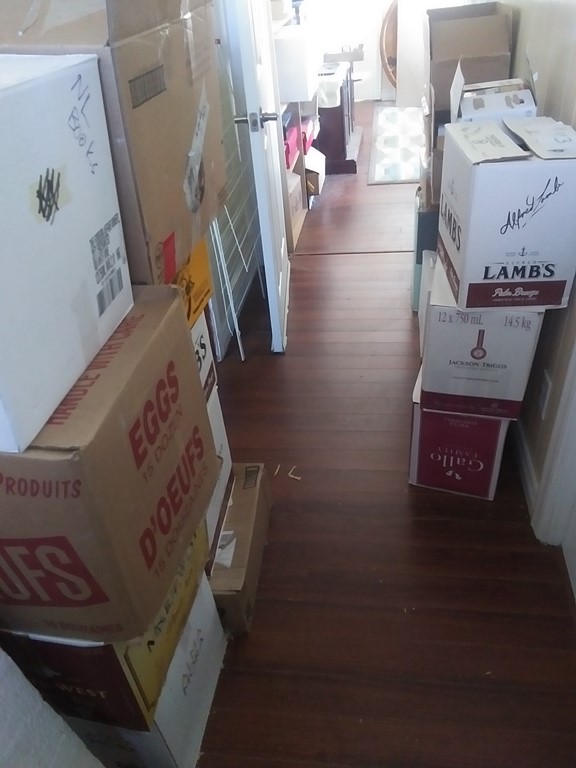
Cartons of non-fiction are scattered throughout the house. Here are two aisles of cartons in the narrow corridor that leads to the laundry (on the left) which houses more cartons.
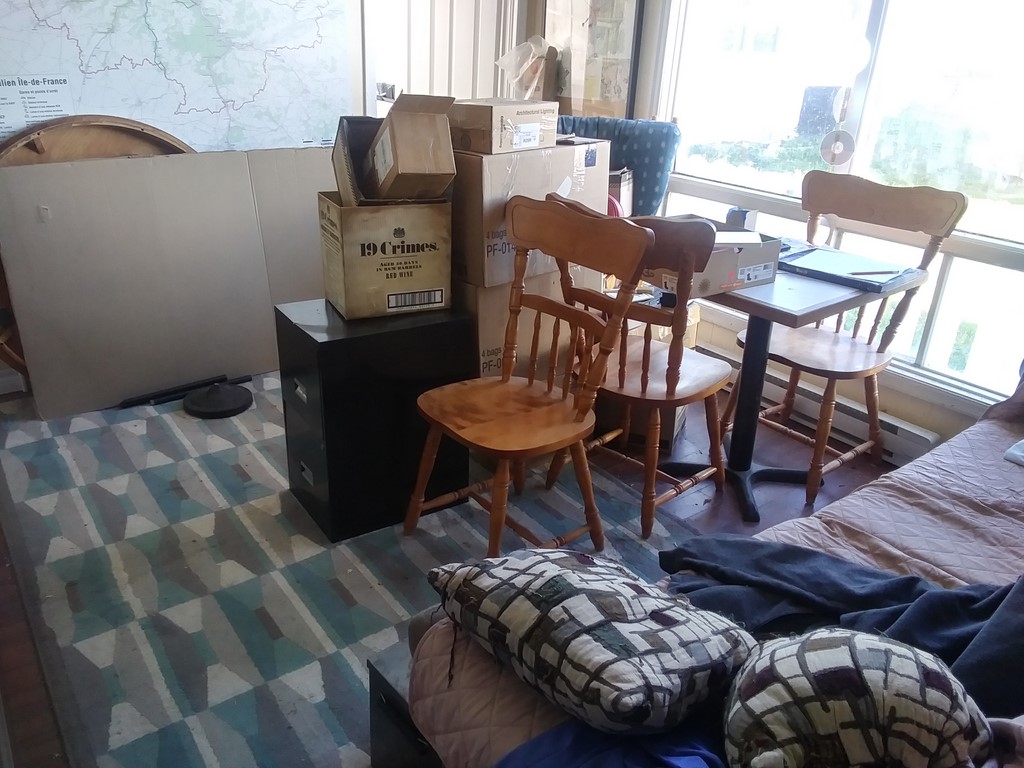
The living-room bears its burdens.
I built the bookcase/shelves without nails. The verticals at each end are slotted, and the horizontals are wedged in. The top surface is gloss white, but I left the faces un-glossed until the whole thing is assembled; that way I can gloss over (nice one Chris!) blemishes caused by hammering a wooden buffer into the edge of the shelf.
Truth is I am waiting for my neighbour David to return from his job in St John's to comment and advise before I lock in the assembly; painting the edges ought to be a job that, with care, can be done after the books are set up. In Dewey sequence, of course.
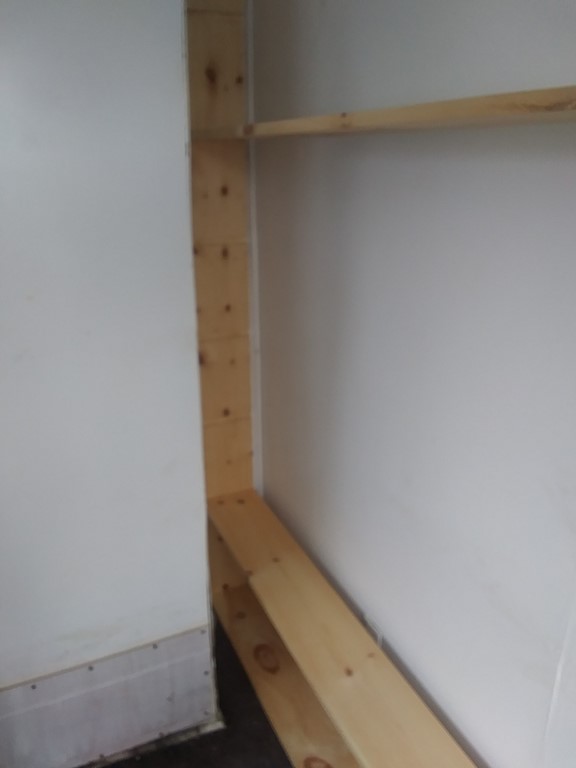
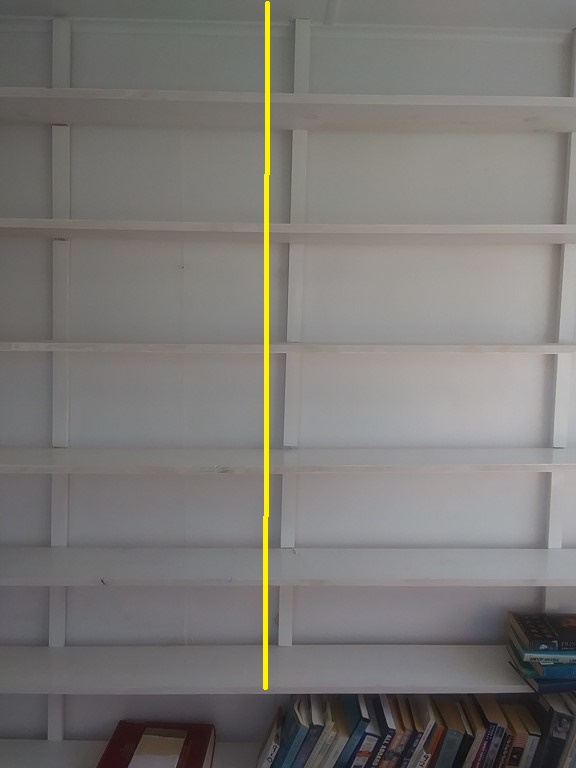
There are three vertical straps behind the shelves, two are visible in the first photo. Each strap has a thee-quarter inch slot, just like the end verticals. My theory is that I have done away with vertical spacers which occupy space that books could use, and cause no end of work when books have to be shuffled to introduce new stock. We shall see ...
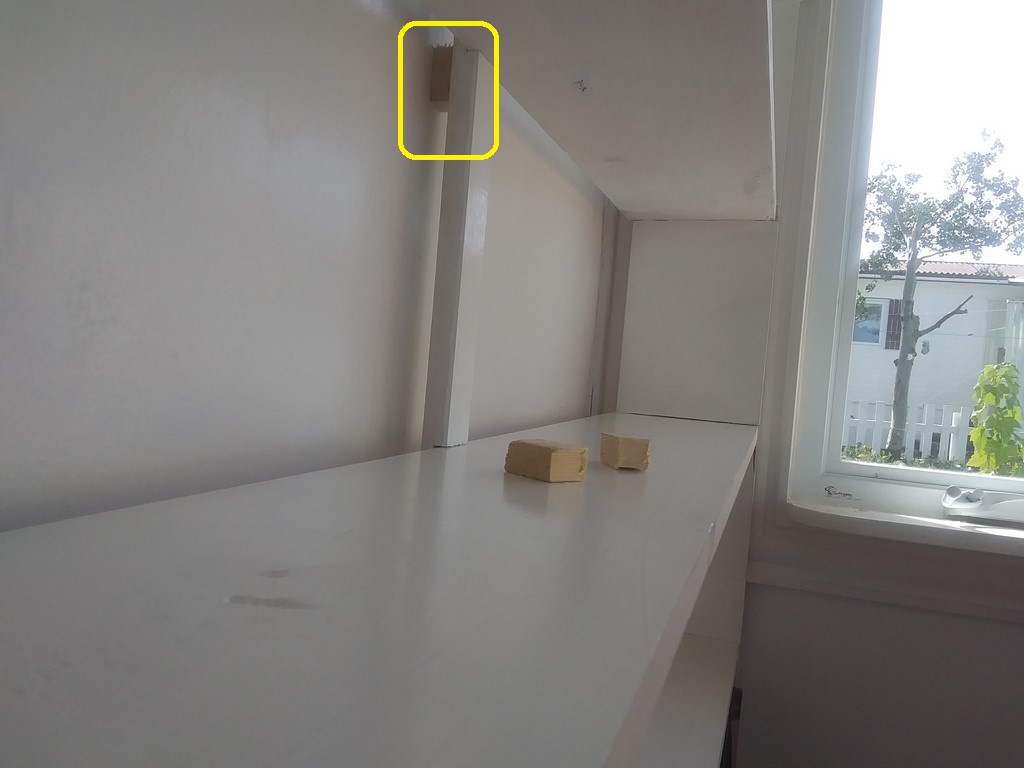
One of my spacer blocks has slipped down a few inches; no matter - it will be placed properly when I reach that shelf. Right now I am still in the 900s. Two small blocks are waiting to be used.
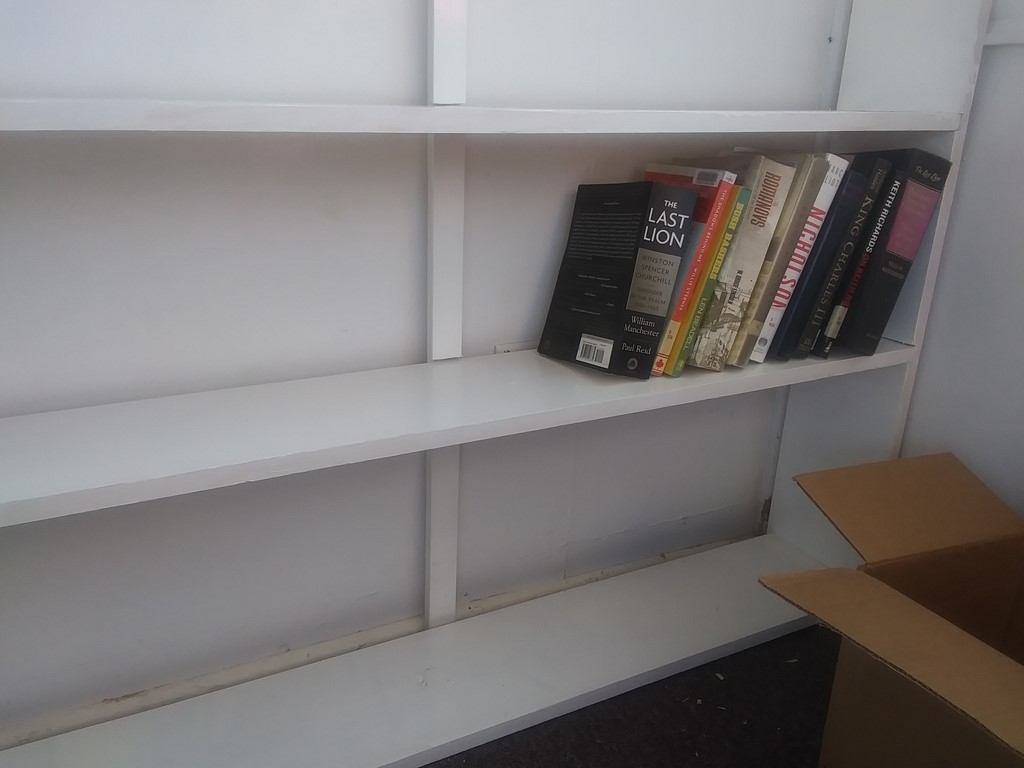
My first carton of 900s is on the shelf. [Auto]Biographies. They are not yet arranged in title sequence. My aim here is to unload all the cartons and flatten them for storage in the shed.
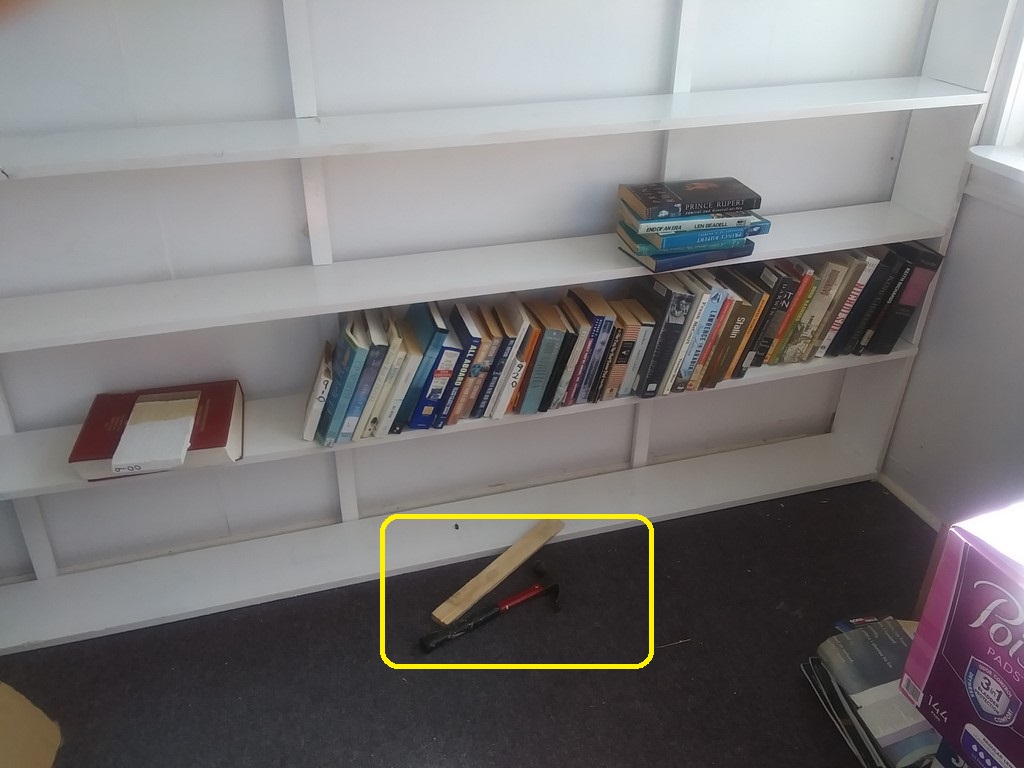
More books have been unloaded. I am now into some geography texts. The four rogue biographies laying flat will easily be slid into place, because I have no vertical spacers within the shelf.
Note the hammer and scrap wood used to cajole various pieces of wood into place. Right now mainly to persuade shelves to slide into my notched verticals.
I am not a good carpenter, and some notches are a sloppy fit, and some need to have the shelf hammered in.
For that reason I did not gloss the front of the shelves, reasoning that hammering would damage the gloss. This will lead to an hour or two carefully glossing the front edge of each shelf with my tongue tip outside my mouth, while I listening to foreign-language podcasts from SBS Sydney.
As well I find that the notched verticals slip sideways, and I must keep track of that.
I have taken a break to let my brain contemplate progress. I have not glued any of the spacer-blocks in place; I want to be sure that the spacers will work before I commit to wood glue. So out to the shed to rough-cut another fourteen spacers!
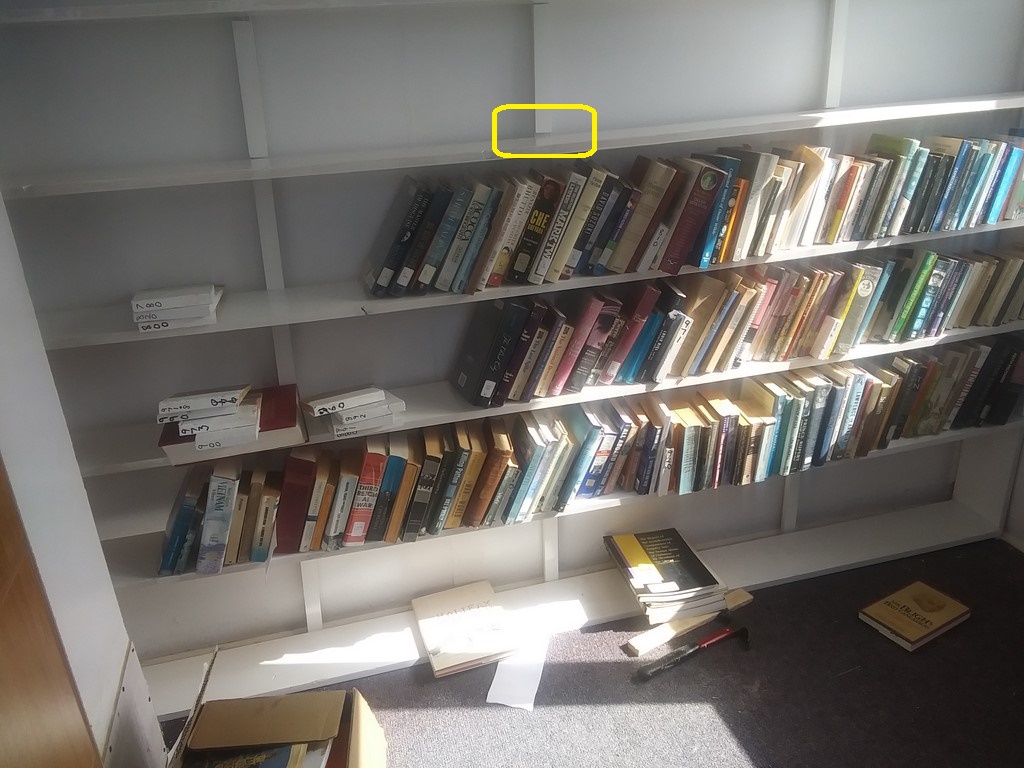
The best part of three shelves are loaded with 900s. For these three shelves, each shelf is sitting in a notch, so far so good. My eyes do not see any sagging at the front edge of the shelves. The notches seem to be effective.
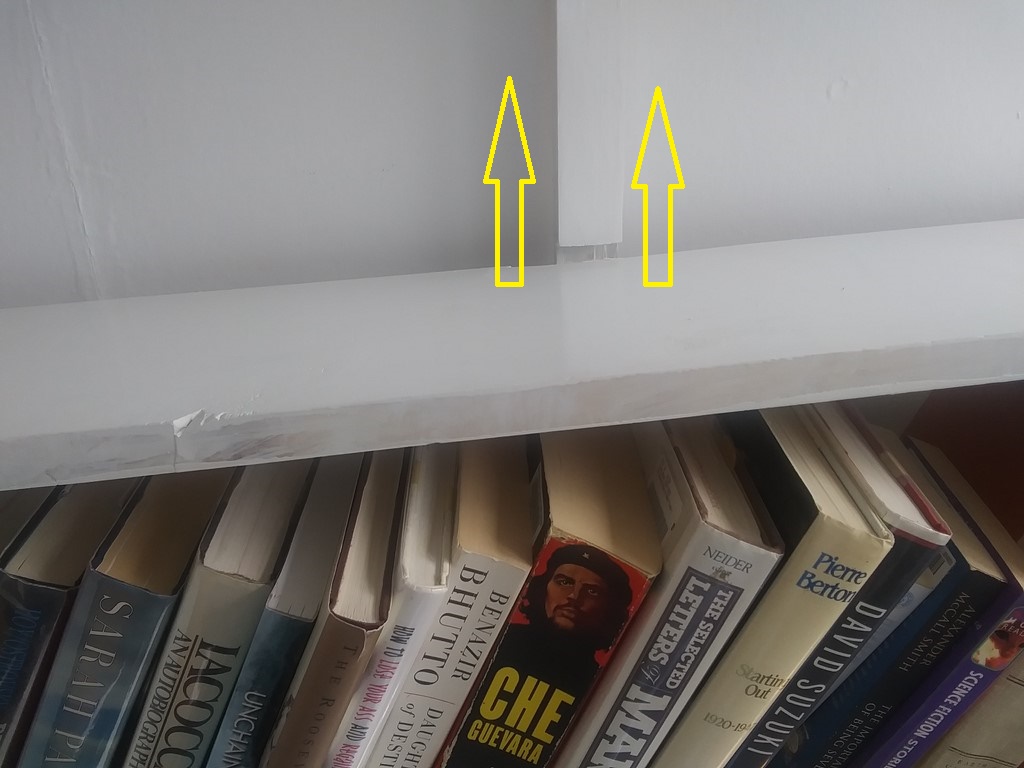
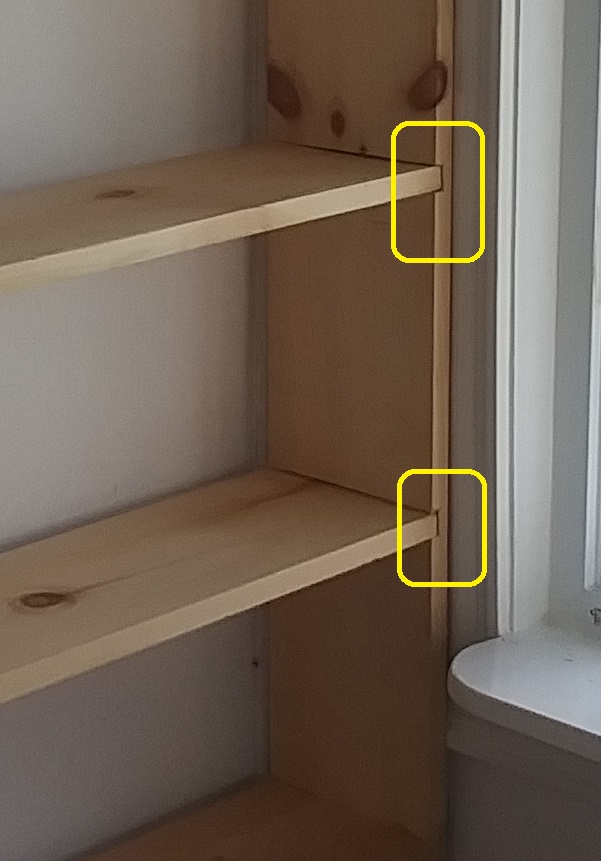
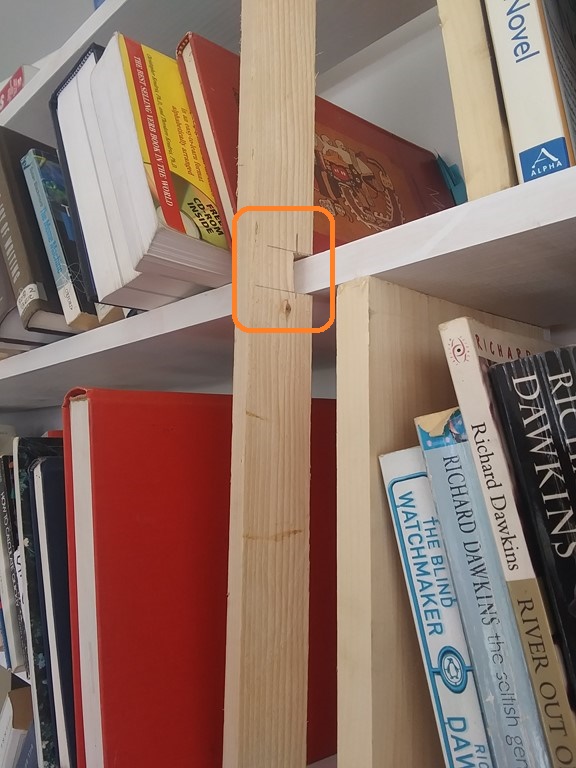
This is the yellow-circled detail of the image above. The first empty shelf has not slotted into its notch, but as I begin loading books towards that central part, I will be able to slot the shelf in. The weight of the books seems to hold the shelf in the notch by friction.
So far I have wedged some blocks behind the notched verticals, but have not glued any blocks
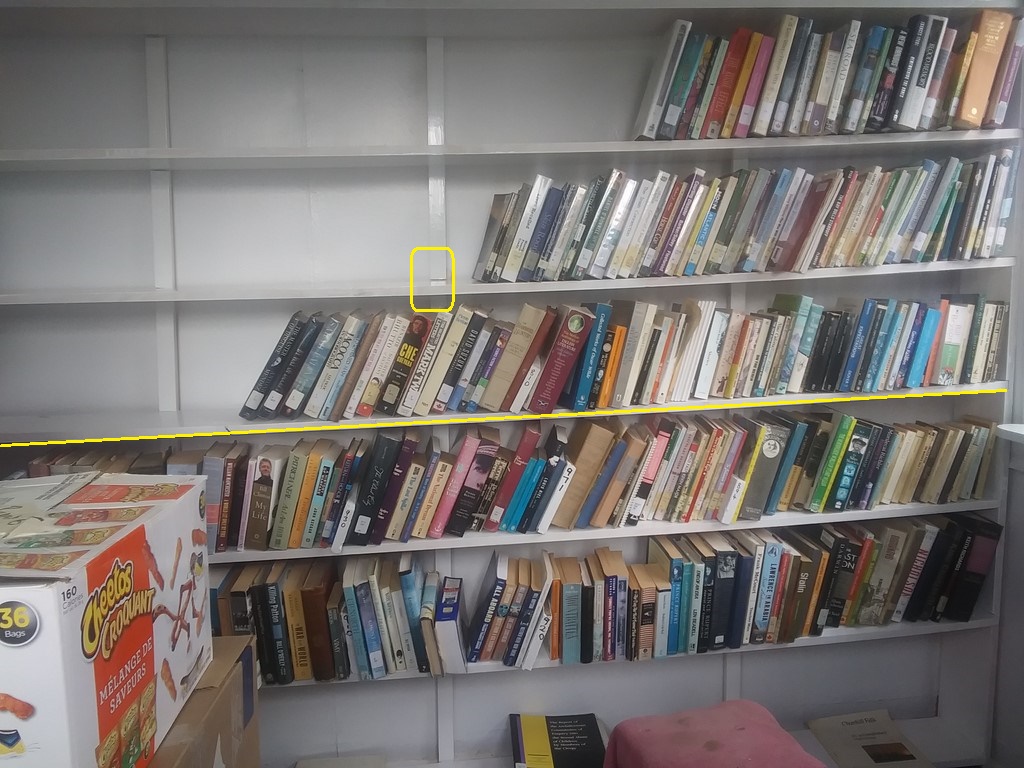
By 1600 (with an interruption and a visitor) I have loaded the 800-900s in the shelves. To the left are stacks of computer and maths books, several cartons of folios.
I believe that I can see a sag in some shelves, but there appears to be no danger of collapse, or of books cascading to the floor. Not all the shelves are settled in their notches (circled above)
I suspect that regular verticals might be called for in the horizontal centre, to avoid the frontal-sag that is occurring when books are aligned with their spines at the front edge of the shelves. You can see this in your mind if you imagine that these nine-foot long shelves are not seven, but forty-seven inches wide!
Sunday, October 02, 2022
The bookcase with temporary verticals installed. I would rather have a copy of the centre vertical, facing inwards. Then I could light-screw from the full side into the front of each shelf, and maintain straight-through space along every shelf.
The verticals, made of off cuts of the shelves, protrude 3/8 of an inch because the shelves themselves are recessed 3/8 of an inch into the rear verticals.
Thursday, October 13, 2022
I have made a front-edge support that runs from the carpeted floor to a point above the top shelf. The run-on provides support for the timber above the top groove of channel.
The interim verticals remain in place until I am ready to hammer and fix the vertical in place.
The shelves do not fully engage with the vertical notches, and will not do so until I remove the interim verticals, one by one.
But first I must paint the vertical with primer and then with gloss white.
Friday, October 21, 2022
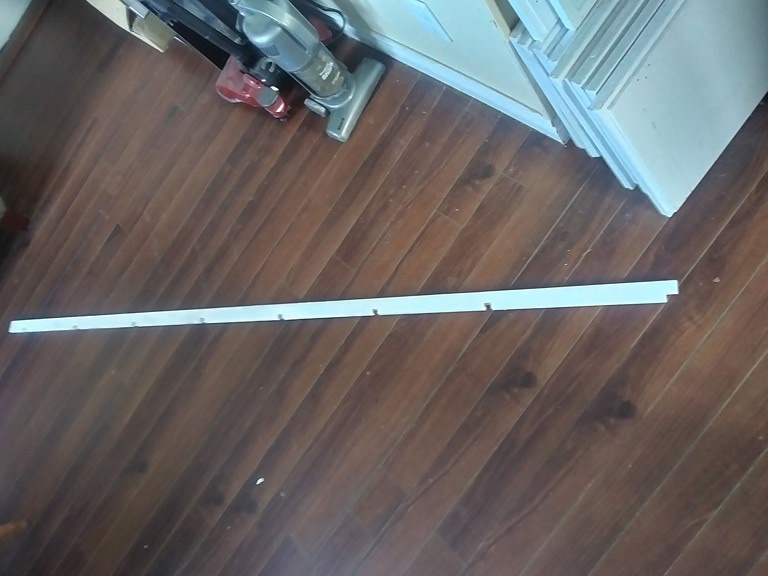
The fourth vertical strip is cut and painted gloss white. Hooray!
This is the "floor end"; a small chunk is cut out to accommodate the lowest shelf, which sits on the floor.
This is the "ceiling end"; it does not reach to the ceiling, but has about three inches left over to avoid that topmost notch splitting.
In theory I can wedge this vertical into place today and then remove the temporary verticals.
At the time I will be able to reload books and slide them back and forth along nine feet of shelving without the need to lift them out to hurdle over vertical supports.
I may use small screws from the front of the strip to anchor the strip into the front edge of each shelf.
Sunday, October 23, 2022
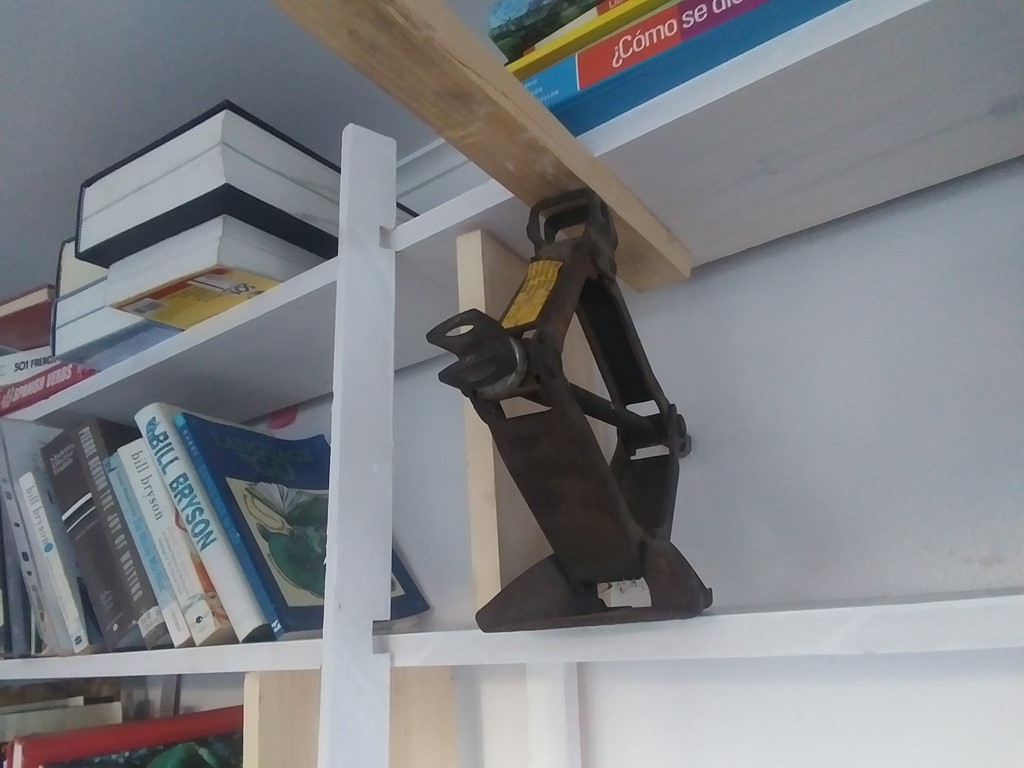
Slow progress. I do not want to empty the shelves to fit the front vertical, so an old car jack is used to lift the top shelf until I can tap home the top notch. Which I can't because the notch is too small by about 2mm. So I shall widen that notch. Tomorrow. Maybe.